

Generate Press Css to Change the Footer Background Color

In this article, we are going to see how to create sticky floating footer bar in GeneratePress theme. I have seen that multiple website owners face problems in creating a sticky floating footer bar in GeneratePress theme and this is one of the most common issues seen on GeneratePress's official forum.
There is a simple method of accomplishing this in the GeneratePress premium version. For those who are running the GeneratePress free version, they need to do this via downloading a plugin.
GeneratePress is a multi-purpose WordPress theme that is fast, flexible and has tons of customization options. Well, the free version does not support granular levels of customization but does offer a lot more than its competitors. If you want to know all the differences in detail, please go through our article GeneratePress free vs premium. I have given a detailed comparison between both versions.
If you are interested in understanding why GeneratePress is so popular and want to have a look at its most crucial features, I'd suggest you click here to go through a detailed review of GeneratePress Theme.
Before we head into creating a sticky floating footer in GeneratePress theme, let us first understand why do we need a sticky floating footer bar on a website.
Why To Create Sticky Floating Footer Bar?
A sticky floating footer bar is a fixed footer bar at the bottom end of your browser's window. As the name says "Sticky", it will always remain at the end of your browser's window, no matter how long the user keeps scrolling down on the page. This is to predominantly display the most important information/content of your website, to your visitors.
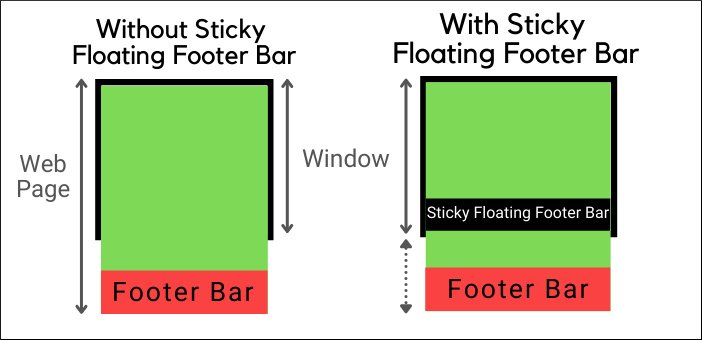
As it remains visible to your users at all times, there is a higher possibility of them clicking on it to find out better content.

This is the place you can offer deals to your customers, create social sharing buttons, have your visitors to opt-in for email subscriptions, or even promote discount coupons. Remember, to use this only for content that turns out to be more useful to your audience.
What Can You Expect From A Sticky Floating Footer Bar?
A sticky floating bar can…
- Get you more clicks to pages that weren't getting enough traffic
- Increase your email list of subscribers as Opt-Ins in a sticky floating footer bar work very well
- Showcase discounts and coupons that you've always wanted to promote on your site. Bringing in more sales and revenue.
To create sticky floating footer bar in GeneratePress theme we will be using 2 methods.
- Method 1: By using a Plugin – Recommended for GeneratePress Free users
- Method 2: By using small amount of Code – Recommended for GeneratePress Premium users
Note: If you are not comfortable with coding I recommend using the plugin, even if you are running the GeneratePress premium theme.
I will be demonstrating method 1 using WPFront Notification Bar plugin on BloggingIdol
Create Sticky Floating Footer Bar In GeneratePress Using Plugin
Below is an image of how my website, BloggingIdol looks like, before creating a sticky floating footer bar

Now we will accomplish method 1, by downloading a plugin called WPFront Notification Bar.
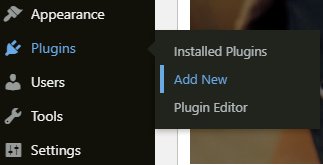
- Go to your WordPress Dashboard, hover your mouse on Plugins and click on Add New.
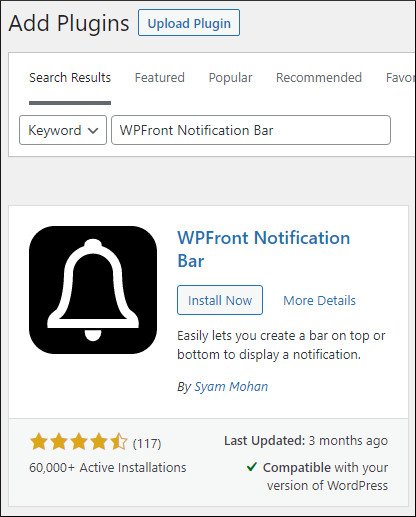
- Type in WPFront Notification Bar in the search box, and later click on Install and Activate.
- Once you've installed and activated the plugin, it will automatically take you to its Settings page.
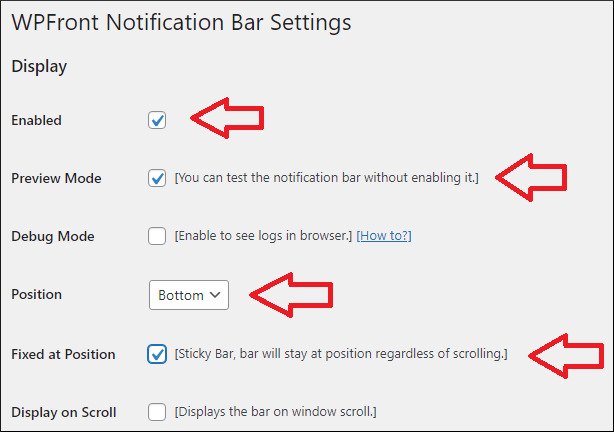
- You will need to check mark Enabled, Preview Mode, and Fixed at Position. Also select Bottom as position.
- Further below you have an option to write your own Custom Text and create Buttons. Moreover, it also offers color customization options to match the theme of your website.
- Don't forget to hit the Save Changes button at the bottom end of the WPFront Notification Bar Settings page.

That's it, this is how you create sticky floating footer bar in GeneratePress theme using a plugin.
Also Read: How to Add Social Sharing Buttons
Create Sticky Floating Footer Bar In GeneratePress Theme Using Code
This method needs you to have GeneratePress premium plugin installed on your WordPress website.
The reason being, you will need a module for accomplishing this task, that only gets bundled with GP Premium plugin.
Note: I will remove WPFront Notification Bar Plugin, before demonstrating this method.
Let's get started then…
Activate Elements Module
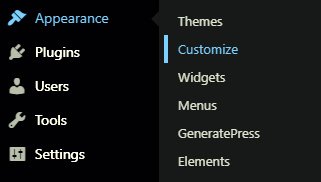
- Go to your WordPress Dashboard, hover your mouse on Appearance and then click on GeneratePress.
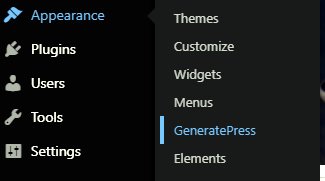
- Here you will need to activate the Elements module.
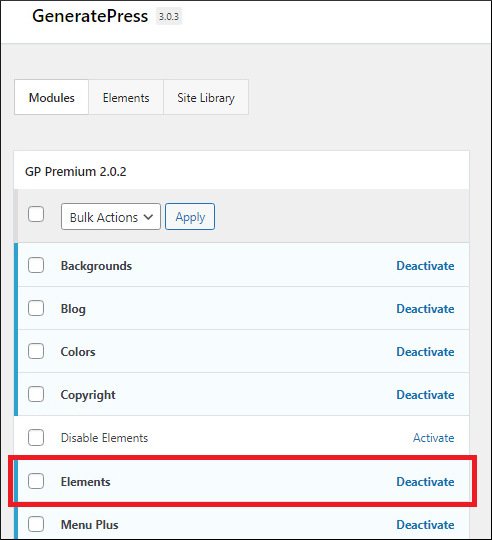
- For BloggingIdol, I have already activated the Elements module on my GeneratePress premium theme.
Create A Hook
For creating a Hook, you will need to Add New Element.
- Go to your WordPress Dashboard, hover your mouse on Appearance, and this time click on Elements.
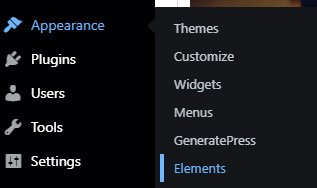
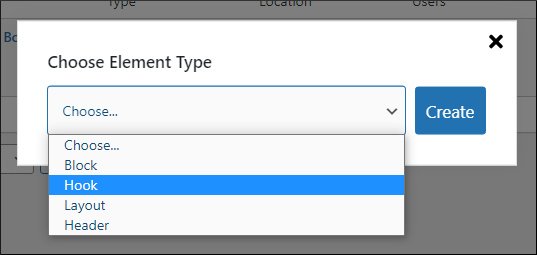
- This will open the Elements Page. Click on Add New Element.

- Once you click on Add New Element, you will see a window to choose from. Select Element type as Hook and click on Create.
- After creating the Hook you will need to add the code.
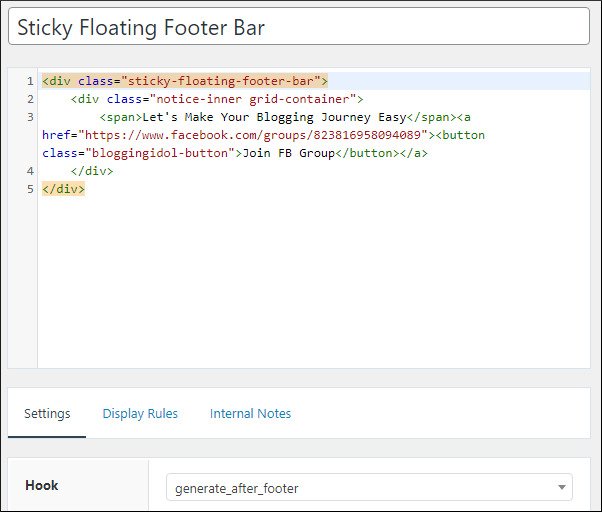
<div class="sticky-floating-footer-bar"> <div class="notice-inner grid-container"> <span>Let's Make Your Blogging Journey Easy</span> <a href="https://www.facebook.com/groups/823816958094089"> <button class="bloggingidol-button">Join FB Group</button></a> </div> </div> - With the code you will also need to select the Hook – generate_after_footer. This will generate the hook after the GeneratePress footer copyright section.
Note: If you want to remove/modify GeneratePress footer credits read how to remove built with GeneratePress article.
- Under Display Rules, select Location as Entire Site. Click on Save.
- Now you will need to use those CSS classes under Additional CSS in GeneratePress Theme Customizer.
- Go to your WordPress Dashboard, hover your mouse on Appearance, and this click on Customize.
- Go to Additional CSS option and put the CSS code.
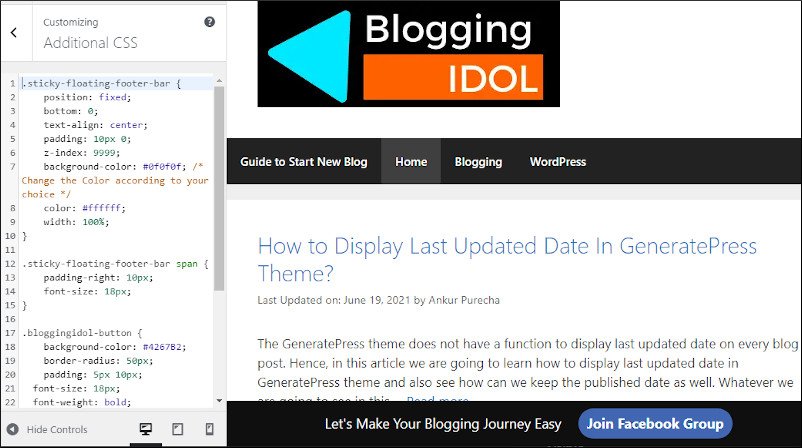
.sticky-floating-footer-bar { position: fixed; bottom: 0; text-align: center; padding: 10px 0; z-index: 9999; background-color: #0f0f0f; /* Change the Color according to your choice */ color: #ffffff; width: 100%; } .sticky-floating-footer-bar span { padding-right: 10px; font-size: 18px; } .bloggingidol-button { background-color: #4267B2; border-radius: 50px; padding: 5px 10px; font-size: 18px; font-weight: bold; margin-left: 12px; } body { margin-bottom: 50px; /* Change to Match with body*/ } 
This is how the sticky floating footer bar looks on desktop and mobile view.
Conclusion
That's it, wasn't it simple.
Basically, using the code is for users who have GeneratePress premium version.
Copy the code and change the color according to your theme style. If you still have any doubts regarding this guide, feel free to leave a comment.
More in Generatepress:
- Reduce spam comments by removing URL field from comment section
Generate Press Css to Change the Footer Background Color
Source: https://bloggingidol.com/create-sticky-floating-footer-bar-in-generatepress/
0 Response to "Generate Press Css to Change the Footer Background Color"
Post a Comment